Start Menu on Windows 10 comes with various different widgets and allows users to access several different apps that are installed on their PC. All the installed apps are sorted Alphabetically and In addition to this, it also has a section for the most-used apps on PC and that section has a list of apps that you frequently use.
While a lot of users find this feature helpful, there are some people who don’t want to see that section in their start menu as they don’t like it. If you are one of them, then you can easily disable this feature by playing around with some settings. While doing this is easy, not many people know how it’s done. Hence in this guide, we are going to show you How to hide Most Used applications list in Start Menu. Without waiting further, let’s get started.

How to hide Most Used applications list in Start Menu
Step 1: Bring up the Settings App on your Windows 10 system. To do this, simply press Windows Key + I on your keyboard and the app will automatically launch on your screen. Alternatively, you can also press the gear icon from the left side of the Start Menu.
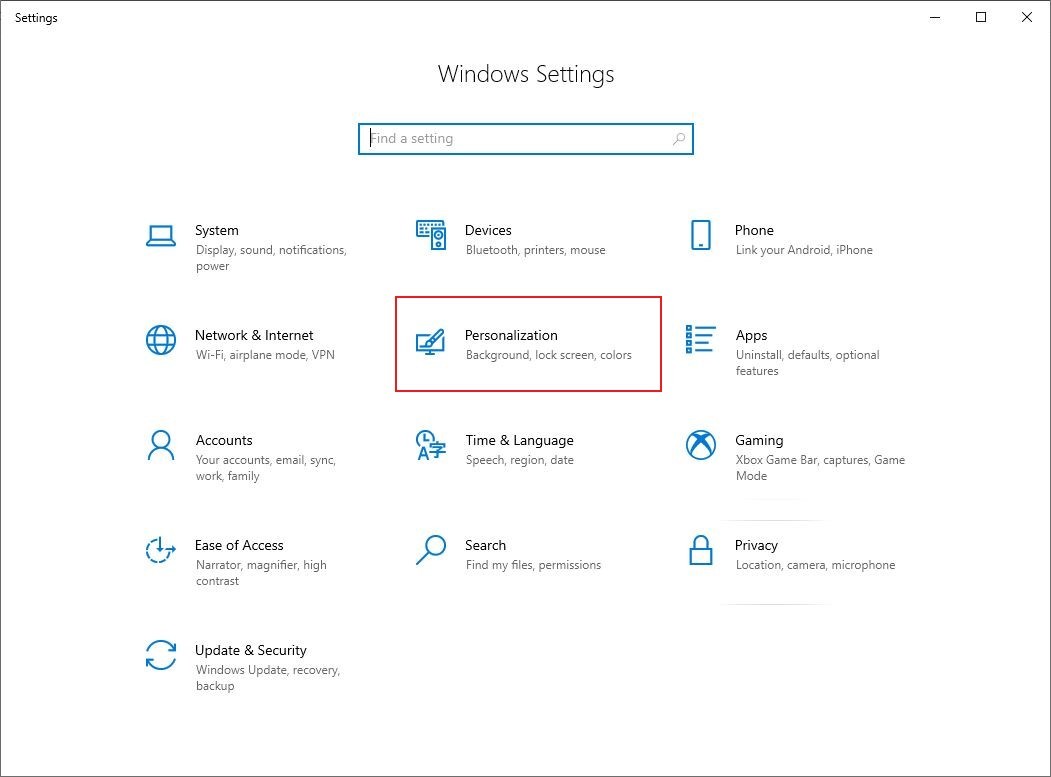
Step 2: Once the Settings App is running on your Windows 10 system, go to “Personalization” to open the personalization-related settings.
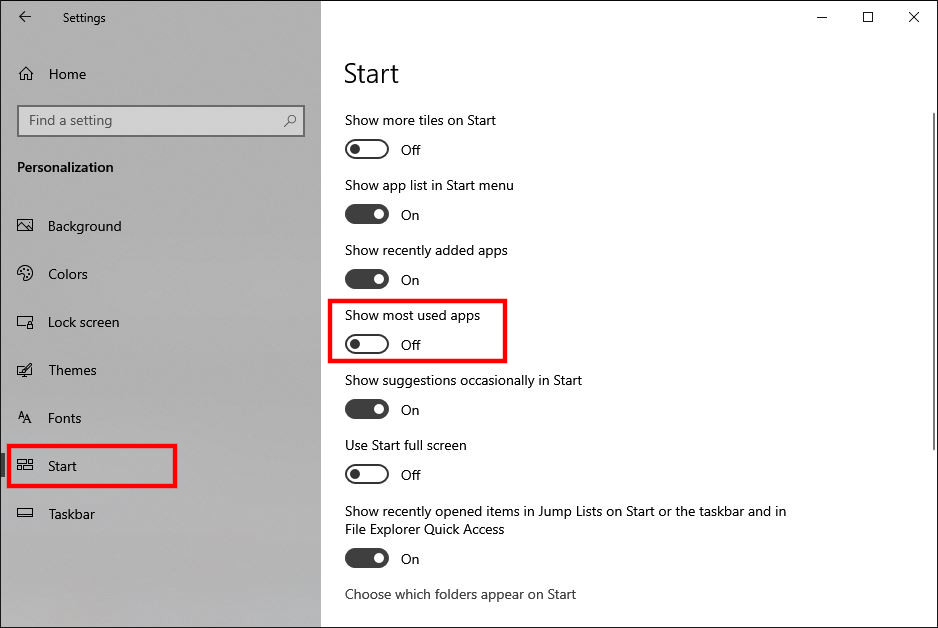
Step 3: Click on the Start tab from the left panel and bring up the Start menu settings.
Step 4: Now on the right-side panel, search for the option that reads “Show Most Used Apps” and turn it off.
That’s all, folks! Once you have done this, you will no longer see your Most Used apps in the Start Menu. More Windows 10 stuff can be found here – Windows 10 tutorials, guides, tips, tricks, and hidden features. Were we helpful? Let us know in the comments below and if you liked this guide then don’t forget to share it using the social media buttons.
