Windows laptops are already popular in the market because users love the features it offers however after Windows Laptops and Macbooks, Chromebooks by Google are getting really popular these days and it’s mainly bought by students who just need a laptop for normal day to day tasks. One of the main reasons behind its popularity is ChromeOS and users have started loving it as it’s an easy-to-use & simple system.
While ChromeOS comes with some interesting features, there are also some hidden features that aren’t known by many users. In Chrome OS 87, the company has introduced a feature that allows you to rename the windows. Since this is a hidden feature not many people know how to use it and hence in this guide, we are going to show you How to enable the Window Naming feature on Chromebook. Without waiting further, let’s get started.

How to enable the Window Naming feature on Chromebook
Step 1: Bring up Google Chrome on your Chromebook.
Step 2: Once Google Chrome is running, enter the following address in the Address Bar.
chrome://flags

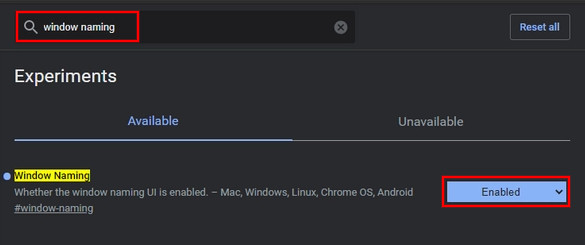
Step 3: A new page will pop up on your screen with the title “Experiments” and you’ll see two categories – Available and Unavailable. In the Available section search for “Window Naming”. You can either scroll all the way down looking for it or you can search for it using the search bar.
Step 4: Once you’ve found the “Window Naming” option in the Available section, click on the drop-down menu right next to it and Enable the feature by selecting “Enabled“.
Step 5: After saving your changes you’ll be asked to Restart your device. Do it and your job will be done.
That’s all. Once the Chromebook restarts you will be able to rename the open Window to anything you like. To use the feature, just right-click on the title bar of the Chrome window, and from the context menu, click on “Name Window” and you will be able to customize the name.
Were we helpful? Let us know in the comments below and if you liked this guide then make sure you share it using the social media buttons.
